247 | resource | FileZilla FTP client tutorial
- how to download FileZilla FTP client software from the internet
- how to install it
- FTP server connection basic
- how to connect to the FTP server (Using Toolbar)
- how to connect to the FTP server (Using Sitemanager)
- how to upload files
- how to download files
Download FileZilla
FileZilla is free to download and use. Go to filezilla-project.org and look for the link called "Download FileZilla Client". 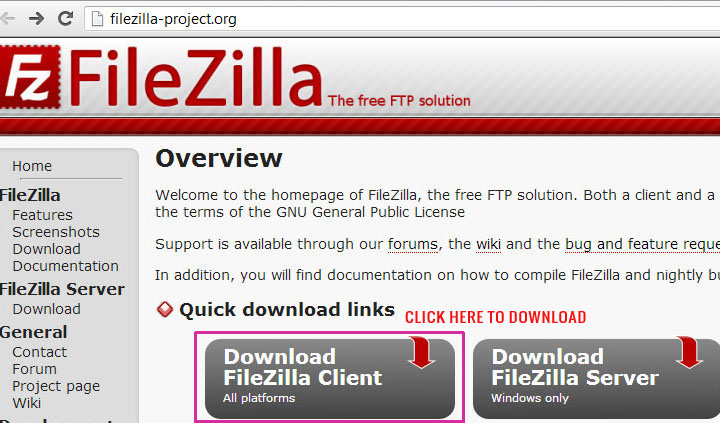
Clicking on that link should load a new page. You will see a list of software for different versions. Choose FTP client based on your operating system. I use windows 7, So i download windows based FTP. 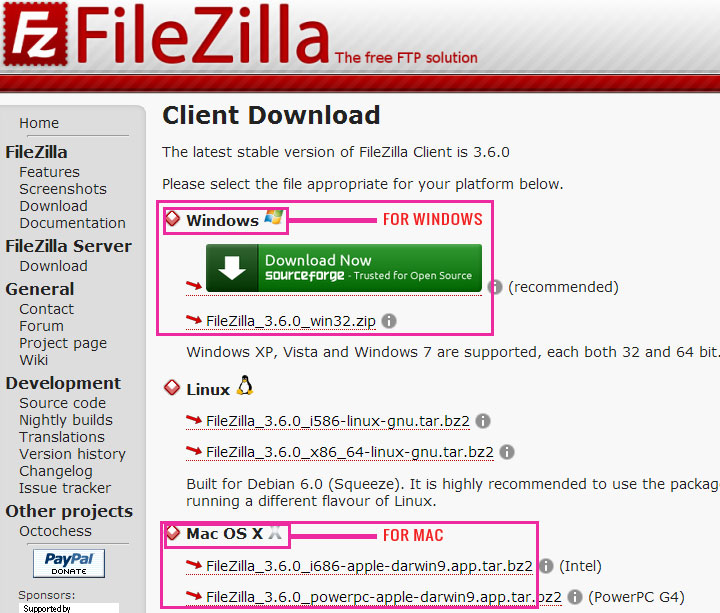
Installing FileZilla
Once the download is completed, install it by double clicking on the file just downloaded and follow the on screen instruction. Installing procedure is same as other windows application.
Connect to FTP server
First, open FileZilla, the same way you do other applications. You can see a toolbar under menu. 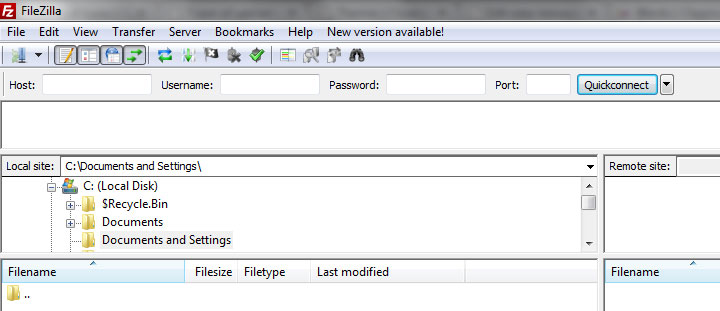
Lets connect to Clipping Path 247 FTP server. To do this you need FTP HostAddress, UserName and Password. If you don't know much about this please read about FTP System
Lets say your FTP login details are as follows:- FTP Host: ftp.clippingpath247.com
- FTP Username: username@clippingpath247.com
- Password: yourpassword
- yourusername & yourpassword are the ones you choose at the time of registration into our website.
Establish connection Using Quick connect
Just fill the Host, Username and Password fields located along the top and press Quickconnect button. 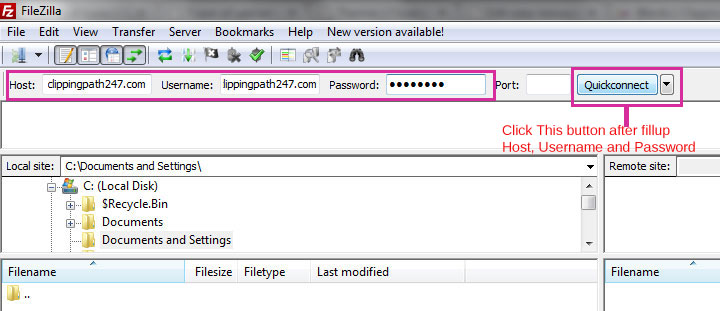
If the connection was successfull, the following successfull status will be shown. 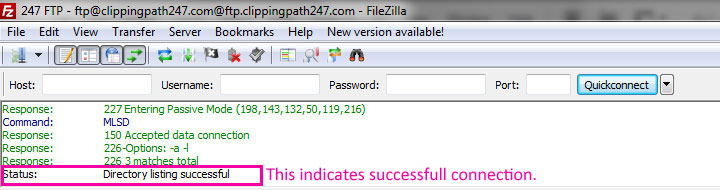
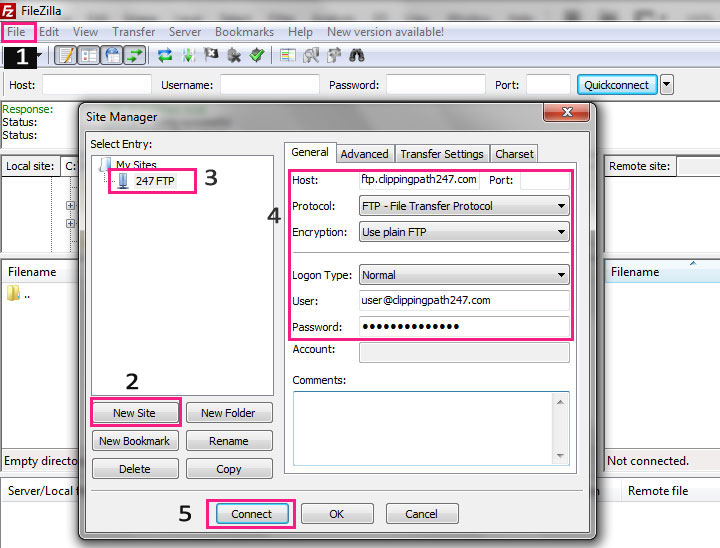
Establish connection Using Site Manager
This option has several advantages. You can store connection setting and reconnect with FTP whenver needed. As indicated in the below image, do the following:
- Click File Menu and select Site Manager
- Click New Site button and Name your site like 247 FTP
- Select 247 FTP (Your new site name)
- Fill up Host, User Name and Password filed
- Now finally Click Connect button
If everything is OK, you can see the below successfull message.
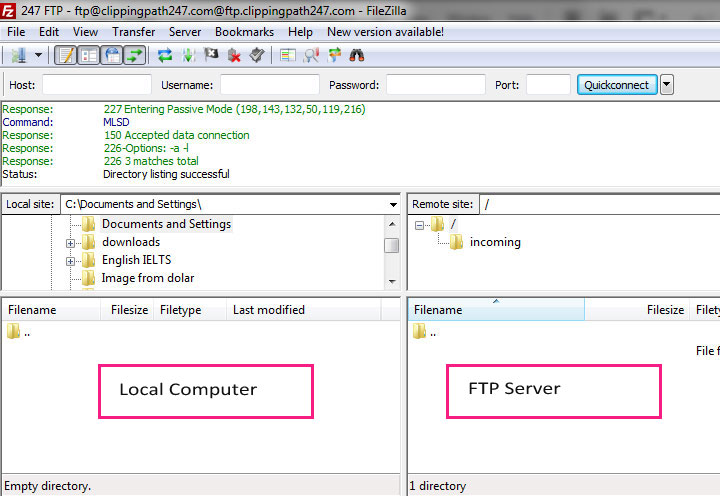
Upload files
As you can see there are two sides in FileZilla; Local site and Remote site. On the Local site you can browse and select files/folders within your computer and on the Remote site you browse and select files/folders on the server.
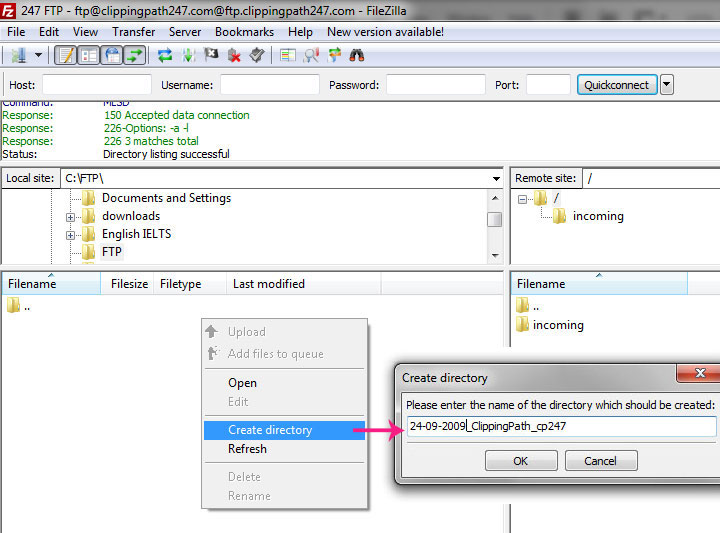
Now create a folder on the Remote site first by right clicking on the empty area and choosing Create directory. It will then prompt you to give a name for the directory. Give a directory name as your learn from Job Processing Guideline. Suppose our direcotry name is: 24-09-2009_ClippingPath_cp247.
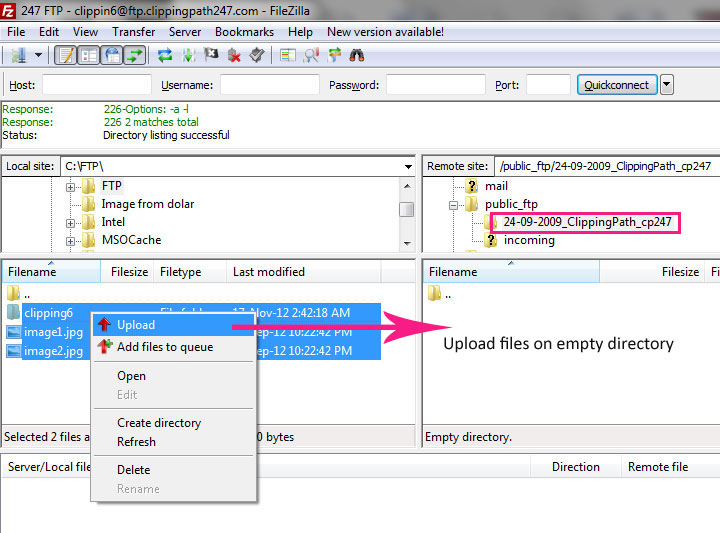
 Once the folder is created, double click on it to enter into it. Now browse your local computer , select files and folder and then click right button and from pop up info select upload. You can also drap and drop files / folder directly to remote site.
If everything is OK, you will see the below image.
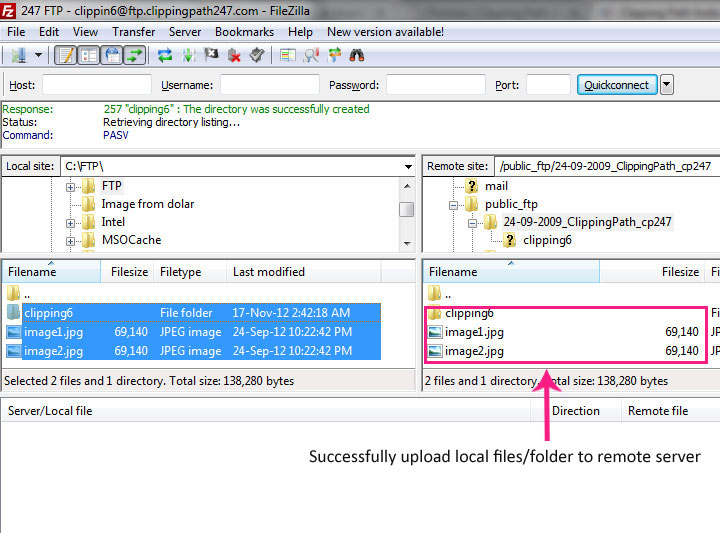
There are two more tabs along the bottom, if any file upload is failed, it will be listed under Failed transfers, and the files successfully transferred will be listed in the Successful transfers area.
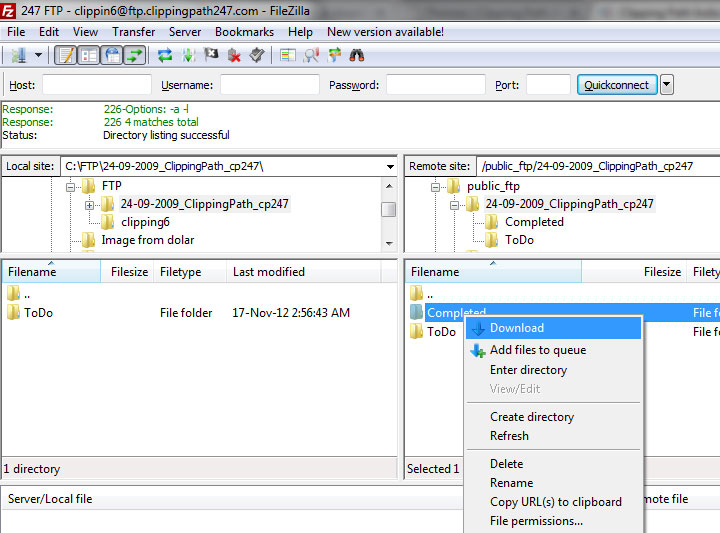
Download files
Downloading files from server to your local computer is as simple as uploading. Just choose the directory on your Local site where you want to download the files into, then select the files/folders you want to download on Remote site and then drag-n-drop or right click and choose "Download".